
productivity software
Productivity software is a type of application software used for producing information.
You might be using personal email and saving files on your computer or cloud system for your organisation's work.
Have you wondered how to keep them securely, share your files with others, and save them in a way that other people can easily check?
A cloud system to save documents online in one place is important so that many people can easily access documents. Files need to be saved safely in case someone's device breaks or active members change.
The productivity software makes it possible to
- send emails
- manage calendars
- create documents, spreadsheets and presentations
- organise video calls and online meetings
- manage files and documents
- collaborate with teams
There are two main productivity software options, Microsoft Office 365 and Google Workspace. In your organisation, think first about which tool is most suitable before applying for an offer.
What does Microsoft nonprofit offer?
"Best for small & mid-sized nonprofits that need email, cloud file-storage and sharing, web conferencing with IM, audio, and HD video, and other services. “
Price
- Microsoft 365 Business Premium: Free for up to 10 users, including Office desktop applications. The discounted price is at 5.1€ per user per month for additional users.
- Microsoft 365 Business Standard 2,8 €/ user/ month.
- Microsoft 365 Business Basic: Free for up to 300 users. Web and mobile versions of Word, Excel, and PowerPoint are included.
Send the application
1. Visit the Micorsoft website
Klikkaa “Rekisteröi nyt”- painiketta, jos järjestölläsi ei ole Microsoftin tiliä. Huom. tämä on eri asia kuin henkilökohtaiset Microsoft-tilit.
2. Täytä rekisteröintilomake.
Contact Email: Type the email address that you usually use because you will get a verification code to this email address.
3. Vahvista sähköpostiosoitteesi.
The verification code is sent to the email address you typed. Check your email box and type the code you received.
Fill out your organisation's information
- Check the information written on the organisation's register extract from the Finnish Patent and Registration Office (Patentti- Ja Rekisterihallitus, PRH in Finnish) and complete the registration form based on it.
- Organisation budget: It is in US dollars. You can convert the currency from Euro to USD by googling or searching for information on your browser.
- Mission Statement: You can write a summary of your organisation's mission. You can, for example, use texts from your website if you already have a written text somewhere.
- Y-tunnus: Type your Business ID, it is in a format of 1234567-8.
- Optional: You can also attach the registry extract of your organisation in .jpg, .jpeg, .png or .pdf format. 2MB is the maximum size of the document.
- Verify Phone number: Choose to verify your phone via text message or phone call.
- Create an account: You need to make a new account for your organisation. At this point, you cannot connect your domain name with Office 365.
Make sure to save or write down the password you use. You will need this password to set up your Microsoft account later.
Wait for the decision from Microsoft
Microsoft checks your organisation's eligibility, which takes up to 7 working days. You will receive an email when your eligibility has been checked.
- If your application is accepted, the email will say: "Your organisation is now eligible for grants and discounts". Go to the next steps in this guide for more information on how to set up an account.
- Jos hakemuksesi on hylätty, ota yhteyttä TechSoup:in koordinaattoriin osoitteeseen techsoup(at)techsoup.fi ja saat lisätietoja hakemuksen hylkäämisestä.
Set up your account
- Kirjaudu tilille käyttämällä sähköpostiosoitetta, jonka pääte on @omayhdistyksennimi.onmicrosoft.com, ja salasanaa, jonka olet luonut tiliä luodessasi. Voit myös tarkistaa Microsoftilta saamasi sähköpostiviestin, jossa on tilisi tiedot.
- Set up authentication method:
1st step is with the phone application (Authenticator), and then 2nd step is with the phone number or the email address.
Choose another method if you do not want to use the authenticator application. In this case, you need to set up verification with a phone number and an email address.
Authenticator Application
If you do not have an authenticator application, download it from the link: https://www.microsoft.com/en/security/mobile-authenticator-app
- Open the Authenticator app on your mobile device.
- Choose scan QR code.
- Scan the QR code that is on the admin account setting on your Authenticator app.
- You can choose the option suitable for you to complete the verification step.
Huomaa! Kun kirjaudut tulevaisuudessa uudella laitteella luotuun tiliin, kirjautuminen on vahvistettava käyttämällä Authenticator- todentajasovellusta mobiililaitteellasi.
Connect with your organization’s domain
If you already have an organization's domain, follow the instructions to connect it with Microsoft 365. Recommended to check with the domain service provider how to connect the domain with Microsoft 365.
Once connected, the email domain will automatically appear when new users are added via the Admin Center.
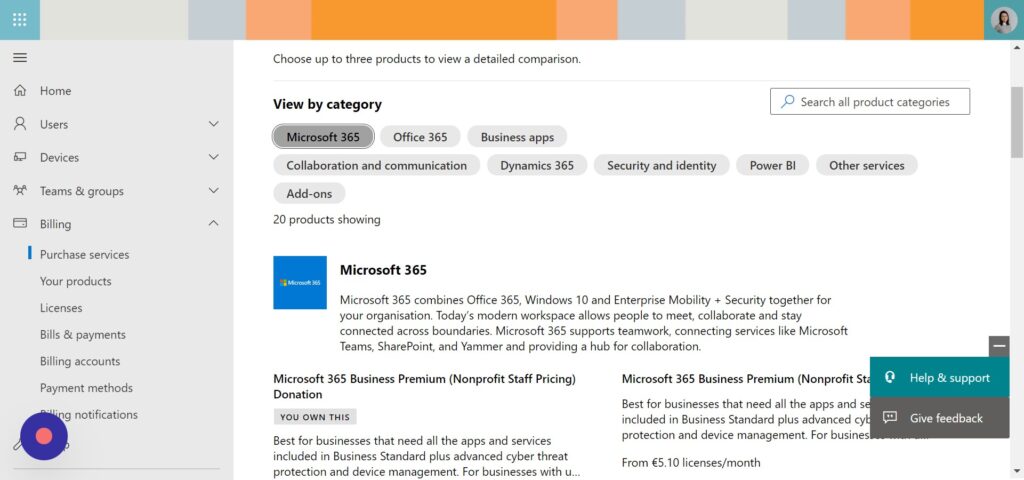
Purchase licenses
- Log into the Microsoft 365 Admin Centre: https://admin.microsoft.com/.
- Click "Billing" > "Purchase services"

- Choose Microsoft 365 Business Premium, free for up to 10 users (when your organization’s eligibility is confirmed).
- It asks you to fill in the payment card information even if the purchase amount is 0 euros. Double-check always the amount of money you are purchasing. If you go over the limits of free licenses, it will cost to purchase an additional license.
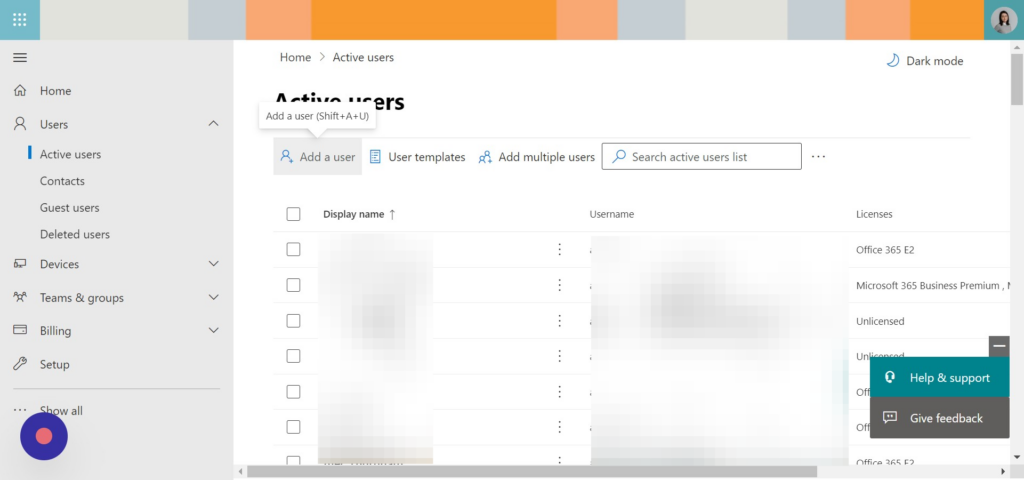
Create new users and assign licenses to users
After purchasing the licenses, you need to assign them to the user.
- Click "Users" from the left-hand side
- Click "Active users"
- Click "Add a user"
- Follow the instruction video:
How to ask for support from Microsoft
- Log in to the Microsoft 365 Admin centre to receive their help and support.
- Click "Help & Support" on the right bottom of the page.
- Type the problem you are having in the search bar.